# Deploy
Redwood is designed for both serverless and traditional infrastructure deployments, offering a unique continuous deployment process in both cases:
- code is committed to a repository on GitHub, GitLab, or Bitbucket, which triggers the deployment
- the Redwood API Side and Web Side are individually prepared via a build process
- during the build process, any database related actions are run (e.g. migrations)
- the hosting provider deploys the built Web static assets to a CDN and the API code to a serverless backend (e.g. AWS Lambdas)
Currently, these are the officially supported deploy targets:
Redwood has a CLI generator that adds the code and configuration required by the specified provider (see the CLI Doc for more information):
yarn rw setup deploy <provider>
There are examples of deploying Redwood on other providers such as Google Cloud and direct to AWS. You can find more information by searching the GitHub Issues and Forums.
# General Deployment Setup
Deploying Redwood requires setup for the following four categories.
# 1. Host Specific Configuration
Each hosting provider has different requirements for how (and where) the deployment is configured. Sometimes you'll need to add code to your repository, configure settings in a dashboard, or both. You'll need to read the provider specific documentation.
The most important Redwood configuration is to set the apiUrl in your redwood.toml This sets the API path for your serverless functions specific to your hosting provider.
# 2. Build Command
The build command is used to prepare the Web and API for deployment. Additionally, other actions can be run during build such as database migrations. The Redwood build command must specify one of the supported hosting providers (aka target):
yarn rw deploy <target>
For example:
# Build command for Netlify deploy target
yarn rw deploy netlify
# Build command for Vercel deploy target
yarn rw deploy vercel
# Build command for AWS Lambdas using the https://serverless.com framework
yarn rw deploy aws serverless --side api
# 3. Prisma and Database
Redwood uses Prisma for managing database access and migrations. The settings in api/prisma/schema.prisma must include the correct deployment database, e.g. postgresql, and the database connection string.
To use PostgreSQL in production, include this in your schema.prisma:
datasource db {
  provider = "postgresql"
  url      = env("DATABASE_URL")
}
The url setting above accesses the database connection string via an environment variable, DATABASE_URL. Using env vars is the recommended method for both ease of development process as well as security best practices.
Whenever you make changes to your schema.prisma, you must run the following command:
$ yarn rw prisma migrate dev # creates and applies a new Prisma DB migration
Note: when setting your production DATABASE_URL env var, be sure to also set any connection-pooling or sslmode parameters. For example, if using Supabase Postgres with pooling, then you would use a connection string similar to
postgresql://postgres:mydb.supabase.co:6432/postgres?sslmode=require&pgbouncer=truethat uses a specific 6432 port, informs Prisma to consider pgBouncer, and also to use SSL. See: Connection Pooling for more info.
# 4. Environment Variables
Any environment variables used locally, e.g. in your env.defaults or .env, must also be added to your hosting provider settings. (See documentation specific to your provider.)
Additionally, if your application uses env vars on the Web Side, you must configure Redwood's build process to make them available in production. See the Redwood Environment Variables doc for instructions.
# Netlify Deploy
# Netlify tl;dr Deploy
If you simply want to experience the Netlify deployment process without a database and/or adding custom code, you can do the following:
- create a new redwood project:
yarn create redwood-app ./netlify-deploy - after your "netlify-deploy" project installation is complete, init git, commit, and add it as a new repo to GitHub, BitBucket, or GitLab
- run the command
yarn rw setup deploy netlifyand commit and push changes - use the Netlify Quick Start to deploy
# Netlify Complete Deploy Walkthrough
For the complete deployment process on Netlify, see the Tutorial Deployment section.
# Render Deploy
Render is a unified cloud to build and run all your apps and websites with free SSL, a global CDN, private networks and auto deploys from Git — database included!
# Render tl;dr Deploy
If you simply want to experience the Render deployment process, including a Postgres or SQLite database, you can do the following:
- create a new redwood project:
yarn create redwood-app ./render-deploy - after your "render-deploy" project installation is complete, init git, commit, and add it as a new repo to GitHub or GitLab
- run the command
yarn rw setup deploy render, use the flag--databaseto select frompostgresql,sqliteornoneto proceed without a database [default :postgresql] - follow the Render Redwood Deploy Docs for detailed instructions
# Vercel Deploy
The following instructions assume you have read the General Deployment Setup section above.
# Vercel tl;dr Deploy
If you simply want to experience the Vercel deployment process without a database and/or adding custom code, you can do the following:
- create a new redwood project:
yarn create redwood-app ./vercel-deploy - after your "vercel-deploy" project installation is complete, init git, commit, and add it as a new repo to GitHub, BitBucket, or GitLab
- run the command
yarn rw setup deploy verceland commit and push changes - use the Vercel Quick Start to deploy
If you choose this quick deploy experience, the following steps do not apply.
# Redwood Project Setup
If you already have a Redwood project, proceed to the next step.
Otherwise, we recommend experiencing the full Redwood DX via the Redwood Tutorial. Simply return to these instructions when you reach the "Deployment" section.
# Redwood Deploy Configuration
Complete the following two steps. Then save, commit, and push your changes.
# Step 1. Serverless Functions Path
Run the following CLI Command:
yarn rw setup deploy vercel
This updates your redwood.toml file, setting apiUrl = "/api":
# Step 2. Database Settings
Follow the steps in the Prisma and Database section above. (Skip this step if your project does not require a database.)
# Vercel Initial Setup and Configuration
Either login to your Vercel account and select "Import Project" or use the Vercel quick start.
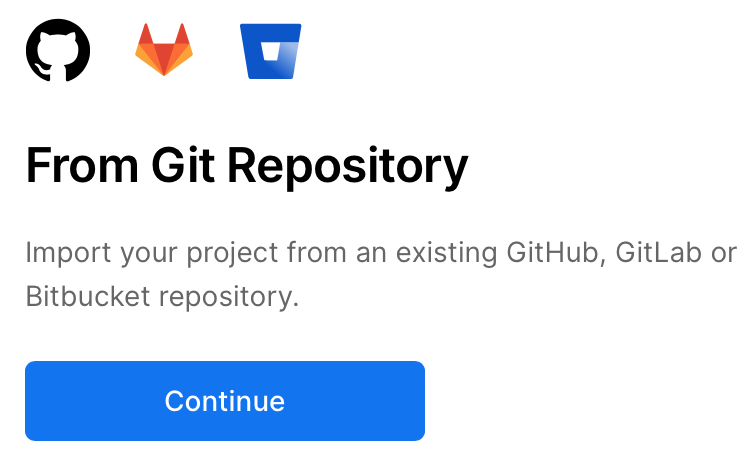
Then select the "Continue" button within the "From Git Repository" section:
Next, select the provider where your repo is hosted: GitHub, GitLab, or Bitbucket. You'll be asked to login and then provider the URL of the repository, e.g. for a GitHub repo https://github.com/your-account/your-project.git. Select "Continue".
You'll then need to provide permissions for Vercel to access the repo on your hosting provider.
# Import and Deploy your Project
Vercel will recognize your repo as a Redwood project and take care of most configuration heavy lifting. You should see the following options and, most importantly, the "Framework Preset" showing RedwoodJS.
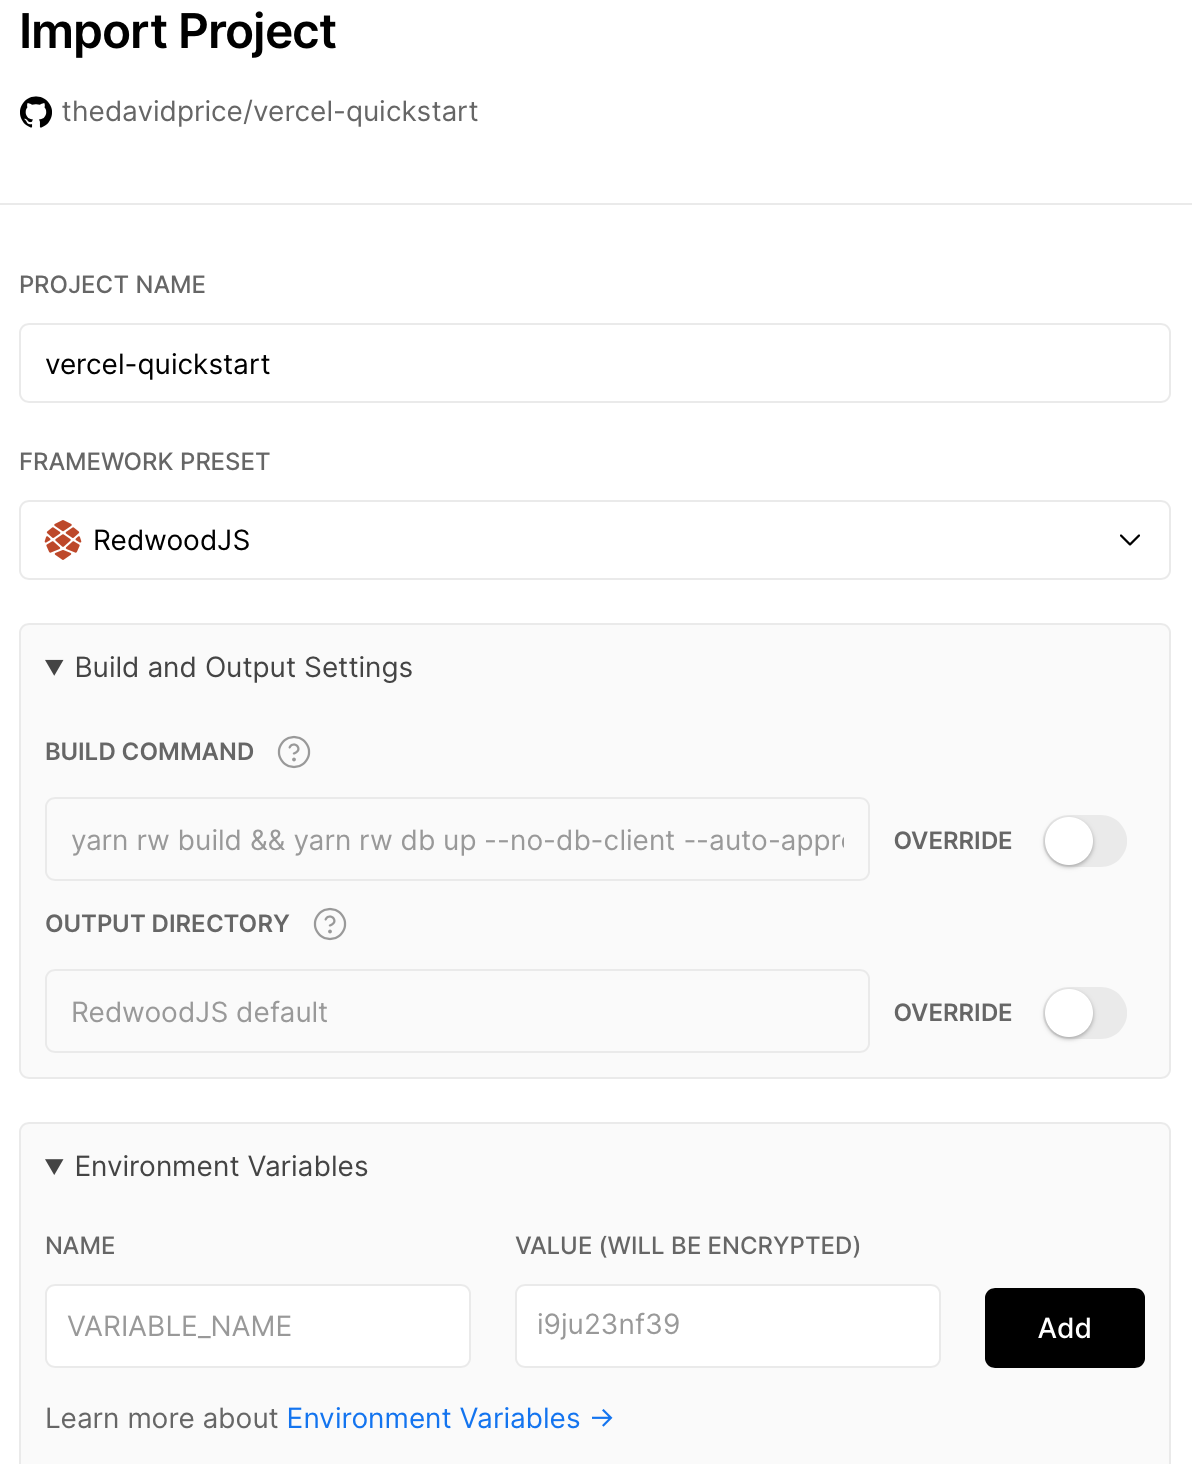
Leave the Build and Output Settings at the default settings (unless you know what you're doing and have very specific needs).
In the "Environment Variables" dropdown, add DATABASE_URL and your app's database connection string as the value. (Or skip if not applicable.)
When configuring a database, you'll want to append
?connection_limit=1to the URI. This is recommended by Prisma when working with relational databases in a Serverless context. For production apps, you should setup connection pooling.
For example, a postgres connection string should look like postgres://<user>:<pass>@<url>/<db>?connection_limit=1
Finally, click the "Deploy" button. You'll hopefully see a build log without errors (warnings are fine) and end up on a screen that looks like this:
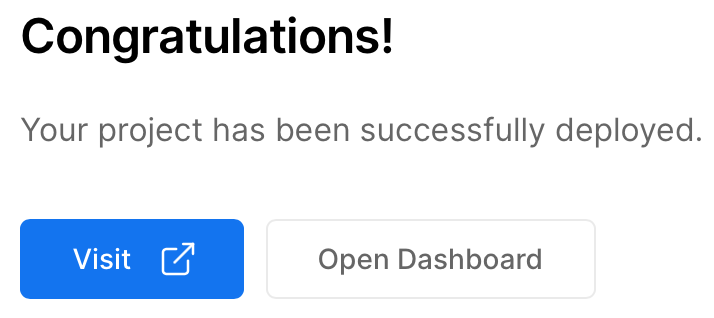
Go ahead, click that "Visit" button. You’ve earned it 🎉
# Vercel Dashboard Settings
From the Vercel Dashboard you can access the full settings and information for your Redwood App. The default settings seem to work just fine for most Redwood projects. Do take a look around, but be sure check out the docs as well.
From now on, each time you push code to your git repo, Vercel will automatically trigger a deploy of the new code. You can also manually redeploy if you select "Deployments", then the specific deployment from the list, and finally the "Redeploy" option from the vertical dots menu next to "Visit".
# Serverless Deploy
The following instructions assume you have read the General Deployment Setup section above.
Yes, the name is confusing, but Serverless provides a very interesting option—deploy to your own cloud service account and skip the middleman entirely! By default, Serverless just orchestrates starting up services in your cloud provider of choice and pushing your code up to them. Any bill you receive is from your hosting provider (although many offer a generous free tier). You can optionally use the Serverless Dashboard to monitor your deploys and setup CI/CD to automatically deploy when pushing to your repo of choice. If you don't setup CI/CD you actually deploy from your development machine (or another designated machine you've setup to do the deployment).
Currently we default to deploying to AWS. We'd like to add more providers in the future but need help from the community in figuring our what services are equivalent to the ones we're using in AWS (Lambda for the api-side and S3/CloudFront for the web-side).
We'll handle most of the deployment commands for you, you just need an AWS account and your access/secret keys before we begin.
# Setup
One command will set you up with (almost) everything you need:
yarn rw setup deploy serverless
As you'll see mentioned in the post-install instructions, you'll need to provide your AWS Access and AWS Secret Access keys. Add those to the designated places in your .env file:
# .env

AWS_ACCESS_KEY_ID=<your-key-here>
AWS_SECRET_ACCESS_KEY=<your-secret-key-here>
Make sure you don't check .env into your repo! It's set in .gitignore by default, so make sure it stays that way.
# First Deploy
You'll need to add a special flag to the deploy command for your first deploy:
yarn rw deploy serverless --first-run
The first time you deploy your app we'll first deploy just the API side. Once it's live we can get the URL that it's been deployed to and add that as an environment variable API_URL so that web side will know what it is during build-time (it needs to know where to send GraphQL and function requests).
Half-way through the first deploy you'll be asked if you want to add the API_URL to .env.production (which is similar to .env but is only used when NODE_ENV=production, like when building the web and api sides for deploy). Make sure you say Yes at this prompt and then it will continue to deploy the web side.
Once that command completes you should see a message including the URL of your site—open that URL and hopefully everything works as expected!
Heads up
If you're getting an error trying to load data from the API side, its possible you're still pointing at your local database.
Remember to add a DATABASE_URL env var to your
.env.productionfile that is created, pointing at the database you want to use on your deployed site. Since your stack is on AWS, RDS might be a good option, but you might find it easier/quicker to setup databases on other providers too, such as Railway or Supabase
# Subsequent Deploys
From now on you can simply run yarn rw deploy serverless when you're ready to deploy (which will also be much faster).
# Environment Variables
For local deployment (meaning you're deploying from your own machine, or another that you're in control of) you can put any ENV vars that are production-only into .env.production. They will override any same-named vars in .env. Make sure neither of these files is checked into your code repository!
If you're setting up CI/CD and deploying from the Serverless Dashboard, you'll need to copy your required ENV vars up to your app on Serverless and then tell it where to get them from. In api/serverless.yml and web/serverless.yml look for the provider > environment section. You'll need to list any ENV vars here, using the ${param:VAR_NAME} syntax, which means to get them from the Serverless Dashboard "parameters" (which is what they call environment variables, for some strange reason).
There are even more places you can get environment variables from, check out Serverless's Variables documentation for more.
# Serverless Dashboard
Note: Serverless Dashboard CI/CD does not support projects structured like Redwood, although they're working on it. For CD, you'll need to use something like GitHub Actions.
It can still be worthwhile to integrate your project with Serverless Dashboard — you'll have features like deploy logs and monitoring, analytics, secret management, and AWS account integration. You can also authenticate into your Serverless account within a CI context. Just remember that if you do use the Dashboard to manage secrets, you'll need to use the
${param:VAR_NAME}syntax.
To integrate your site into the Serverless Dashboard, there are two ways:
- Run
yarn serverless loginand a browser should open asking you to allow permission. However, in our experience, this command will fail nearly 50% of the time complaining about an invalid URL. If it does work you can then runyarn serverlessin both theapiandwebdirectories to link to them an existing app in the Dashboard, or you'll be prompted to create a new one. Future deploys will now be monitored on the Dashboard. - You can manually add the
organdapplines inapi/serverless.ymlandweb/serverless.yml. You'll see example ones commented out near the top of the file.
# Environments Besides Production
By default we assume you want to deploy to a production environment, but Serverless lets you deploy anywhere. They call these destinations "stages", and in Redwood "production" is the default. Check out their Managing Staging and Environments blog post for details.
Once configured, just add the stage to your deploy command:
yarn rw deploy serverless --stage qa
# Removing Your Deploy
In addition to creating all of the services necessary for your app to run, Serverless can also remove them (which is great when testing to avoid paying for services you're no longer using).
You'll need to run this command in both the api and web directories:
yarn serverless remove --stage production
Note that production is the default stage when you deploy with yarn rw serverless deploy - if you have customized this, you have to use the same stage as you deployed with!
This will take several minutes, so grab your favorite beverage and enjoy your new $0 monthly bill!
Pro tip: if you get tired of typing
serverlesseach time, you can use the much shorterslsalias:
yarn rw deploy sls